
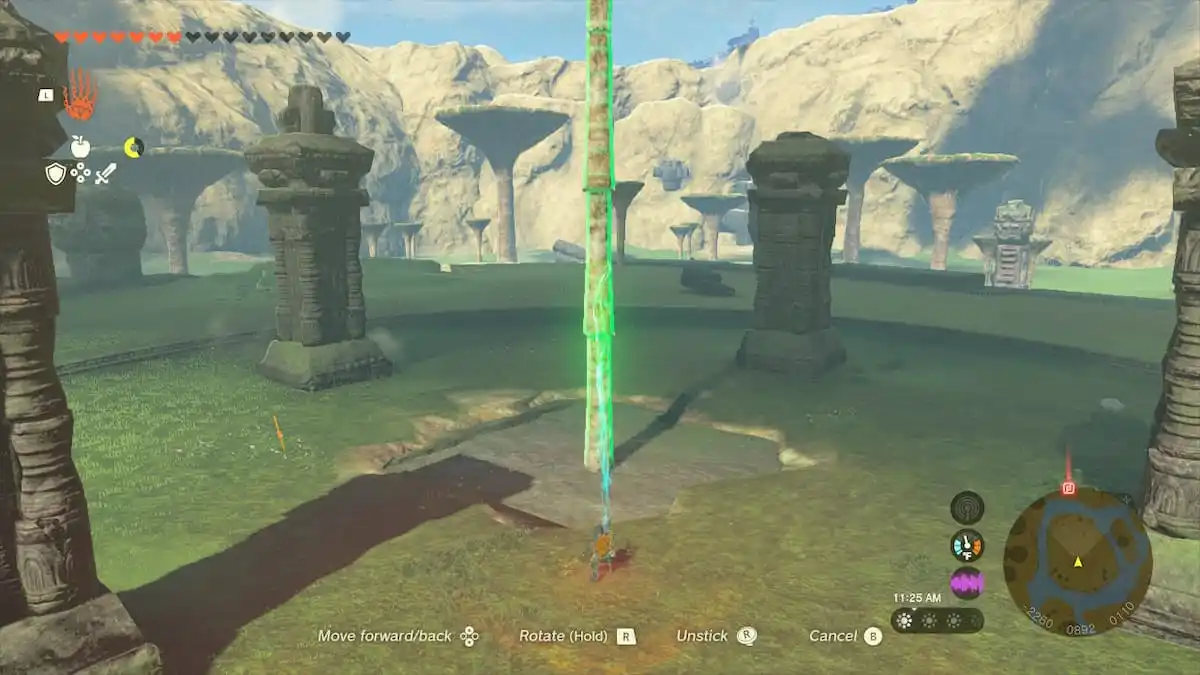
Thundra Plateau TotK is one of those places in Tears of the Kingdom that instantly feels different the moment you step onto it. The sky darkens, thunder rolls in, and suddenly the rules change: metal becomes dangerous, climbing turns slippery, and even basic travel can get you knocked flat by a surprise lightning strike. And yet, that constant storm is exactly why Thundra Plateau is so memorable in TotK—it’s a compact “mini-challenge zone” that tests whether you understand weather mechanics, smart gear choices, and efficient puzzle-solving.
In this guide, I’ll walk you through everything you need to know about the thundra plateau totk experience from start to finish: where it is, how to approach it early without getting fried, how to manage the lightning like a pro, how the plateau’s orb/pedestal-style puzzles work, what to expect in the nearby cave content, and how to farm the area for genuinely useful materials. I’ll also share practical builds, real examples, expert-level tricks, common mistakes to avoid, and a detailed FAQ for the questions players usually get stuck on.
Where Is Thundra Plateau in TotK?
Thundra Plateau TotK sits in the western side of Hyrule’s central band, in the broad stretch between Central Hyrule and the ridgier, more elevated terrain leading toward the northwest. If you’ve been exploring the Hyrule Ridge side of the map (the greener highlands and cliff networks west of Hyrule Field), you’re in the right neighborhood.
What you’re looking for on the surface is a distinct, ring-shaped plateau with ancient stonework and a persistent thunderstorm hanging over it. It’s visually hard to miss once you’re close: the sky stays moody and electric, and the plateau’s circular ruin layout stands out from the surrounding hills.
Practical navigation tips to find it faster:
- Use high ground or a tower launch nearby to scan for a circular ruin formation.
- Look for the storm “bubble” effect—clearer weather outside, then a sharp shift into thunder and lightning as you approach.
- If your route brings you past stables and roads on the western side of central Hyrule, detour uphill toward any obvious circular ruin silhouette.
Even if you don’t have the exact map pin yet, the plateau’s shape and weather behavior make it one of the easier landmarks to identify by sight.
Why Thundra Plateau Matters in Tears of the Kingdom
At first glance, Thundra Plateau TotK can feel like “just” a stormy landmark. In practice, it’s valuable for three reasons:
1) It’s a lightning mechanics crash course
TotK’s lightning rules are simple on paper—metal attracts lightning—but Thundra Plateau TotK forces you to apply that knowledge under pressure. You’ll learn quickly how to manage your equipment, how to move safely, and how to plan fights in a storm.
2) It’s a compact puzzle zone
The plateau is known for pedestal/orb-style interaction—physical objects that must be transported, positioned, and stabilized in specific spots. TotK’s physics and abilities (Ultrahand, Recall, Ascend, Fuse) make these puzzles more flexible than they look, which is great once you know the tricks.
3) It’s a rewarding stop for materials and loot routes
Storm zones tend to pair well with electric enemies and electric-themed resources. That means opportunities for:
- Shock-related monster parts
- Electricity-adjacent cooking ingredients (shock resistance)
- Ore and gem drops in nearby rocky pockets
- Cave rewards if you thoroughly check the plateau’s edges and the surrounding slopes
If you enjoy turning tough zones into reliable farming routes, Thundra Plateau is the kind of place that becomes “easy money” once you’ve mastered it.
Before You Go: Best Gear, Food, and Inventory Setup
You can brute-force Thundra Plateau TotK, but it’s way smoother if you prep specifically for lightning and rain-slick movement.
Lightning protection options (ranked by reliability)
Shock Resistance (good) vs Lightning Proof (best)
- Shock Resistance reduces the damage and stun from electric attacks and lightning effects.
- Lightning Proof (from specific gear effects) can completely trivialize the storm hazard.
Best armor and key effects
- Rubber-style armor pieces (when upgraded and/or completed as a set) are the classic answer for electric zones because they lean into shock mitigation.
- A lightning-proof headgear option (if you’ve acquired it) is the “turn your brain off” solution for storm travel.
If you’re early in the game and don’t have dedicated anti-electric gear yet, don’t worry—you can still clear the plateau safely with smart inventory choices and a few habits.
Food and elixirs that make a huge difference
Bring at least one shock-resistance meal or elixir if you’re not fully geared. Even a modest resistance level is enough to prevent small mistakes from becoming instant disasters.
Also consider:
- Stamina support (for short bursts of climbing when you must)
- A couple of healing meals that you can eat mid-storm if you take an unexpected hit
The single most important inventory rule: manage metal
Lightning targets metal equipment. On Thundra Plateau TotK that means:
- Avoid metal weapons, metal shields, and metal bows if you can.
- If you must carry them, be ready to unequip quickly the moment you hear/see the “you’re about to be struck” warning.
If you want an easy workaround, carry:
- Wooden weapons and shields
- Non-metal bows
- Zonai devices for damage and mobility (they don’t create the same “held metal” danger loop)
Understanding Lightning in TotK (So You Don’t Get One-Shot)
If Thundra Plateau TotK keeps deleting you, it’s usually because the storm is punishing one of three behaviors.
1) You’re holding the wrong gear at the wrong time
The storm doesn’t care that your favorite sword hits harder. If it’s metal, it’s a liability.
When the game signals an incoming strike (the audio cue and the visual warning), your safest habit is:
- Open the quick menu
- Unequip metal weapon/shield/bow immediately
- Re-equip wooden or non-metal gear until the danger passes
2) You’re standing in exposed places during the warning window
Even if you unequip correctly, lingering on the highest point of the plateau when lightning is “locked in” is risky. Move off peaks and avoid being the tallest object in the immediate area.
3) You’re ignoring the tactical advantage lightning gives you
Lightning can be weaponized. If you understand how it targets conductive items, you can intentionally place metal objects away from you to draw strikes where you want them—sometimes even onto enemies.
This becomes a powerful advanced tactic (more on that later), but first, you need the basics: don’t be the lightning rod.
How to Reach Thundra Plateau Efficiently (Early, Mid, and Late Game)
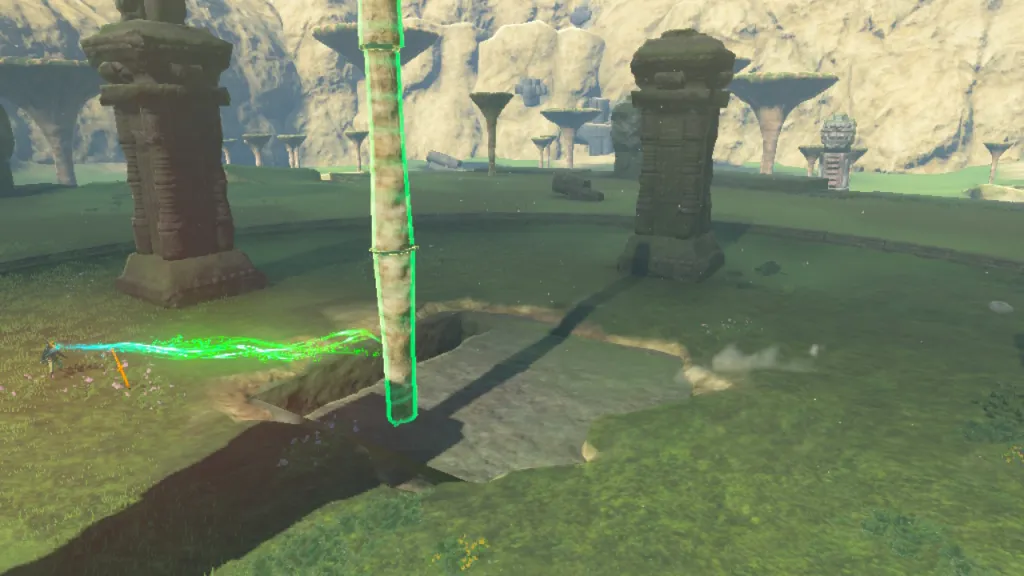
Thundra Plateau TotK is easiest to approach from above, because:
- You spend less time climbing in wet weather
- You can land directly inside the ring structure
- You can scout enemy positions and puzzle objects on the way down
Early game approach: road route + careful climb
If you haven’t unlocked many fast travel options yet:
- Follow roads westward until you’re close enough to see the plateau
- Approach from the side with the gentlest slope
- Save stamina for short, controlled climbs rather than long vertical pushes
Pro tip: in heavy rain, climbing becomes unreliable. If the storm is making you slip constantly, you’ll often do better by walking the long way around and taking a less steep path.
Mid game approach: tower launch + paraglider landing
If you’ve got a nearby tower launch:
- Launch high
- Glide toward the plateau
- Land directly in the ring, preferably near cover or lower elevation
This cuts the “storm exposure time” dramatically.
Late game approach: Autobuild mobility
Once you have consistent Zonai-device mobility:
- A simple fan bike/hover setup makes Thundra Plateau trivial
- You can shuttle puzzle objects faster
- You can exit and re-enter the storm zone quickly for farming loops
Late game, the plateau stops being scary and becomes a quick stop you can clear in minutes.
Exploring Thundra Plateau: Layout, Enemies, and Points of Interest
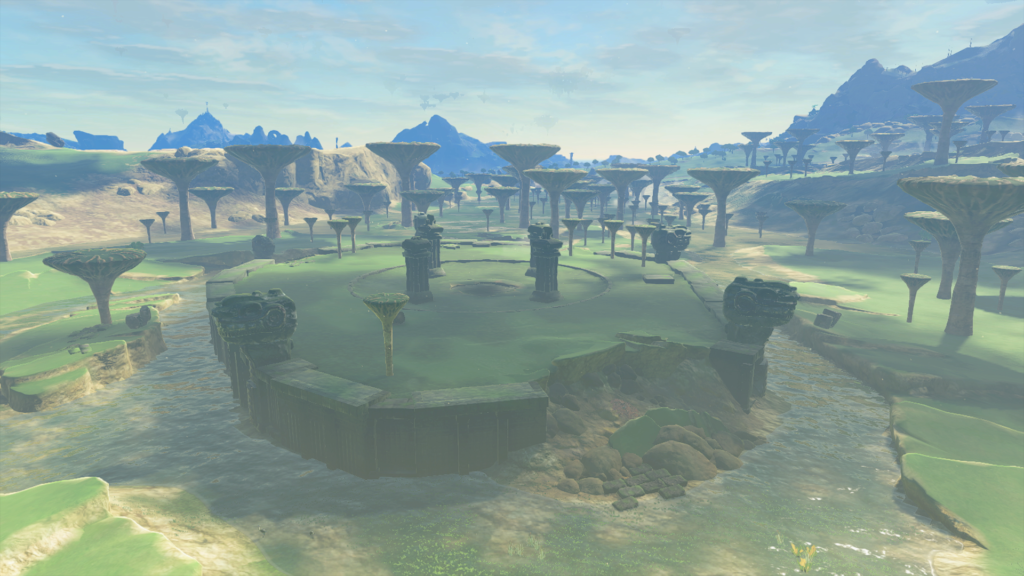
Thundra Plateau’s defining feature is its ring-like ruin structure. As you explore, you’ll typically notice:
A circular outer rim and a central open area
The rim often provides partial cover and elevation changes. The center is usually more exposed—beautiful for visibility, dangerous during lightning warnings.
Pedestals or sockets that suggest a transport puzzle
TotK loves making you physically move objects under environmental pressure. On Thundra Plateau, the “storm stress” is part of the point.
Enemy encounters that punish sloppy positioning
Electric-themed enemies (or enemies placed to take advantage of the wet terrain) can turn a simple fight into a stun-lock chain if you’re not careful. The storm doesn’t just threaten you directly; it also makes you easier to interrupt.
Nearby slopes that hide cave entrances and breakable rock
A lot of players do the obvious plateau content and leave. The better rewards often come from checking the edges, looking for suspicious rock walls, and tracking anything that looks like it leads under the plateau.
Solving Thundra Plateau’s Orb-and-Pedestal Style Puzzle in TotK (Step-by-Step)
When players search “thundra plateau totk,” they’re usually stuck on one thing: how to handle the plateau’s physical-object puzzle efficiently in a thunderstorm.
While your exact object placements can vary depending on what you attempt first, the core logic is consistent: you’ll be transporting heavy, round objects (or similarly awkward items) to specific pedestals/sockets, then stabilizing them so they don’t roll away.
Here’s the cleanest way to do it without frustration.
Step 1: Make the plateau safe to work in
Before you touch the objects:
- Unequip metal gear
- Clear nearby enemies (or at least push them away from your work route)
- Identify the pedestals/sockets first so you aren’t carrying an orb while searching
This alone saves a ton of time because orbs love rolling off ledges at the worst possible moment.
Step 2: Plan the transport path like a builder, not a runner
Most failed attempts happen because players grab an orb and try to “walk it” across uneven ruins.
Instead, do one of these:
- Build a simple cradle: two flat boards or stone pieces angled inward so the orb can’t roll
- Build a low-walled cart or sled: something that prevents side-to-side drift
- Use a long “handle” piece fused via Ultrahand: it gives you control leverage and reduces accidental bumps
You’re not overengineering. You’re removing randomness.
Step 3: Use Recall to undo bad rolls
Recall is quietly one of the best puzzle tools on Thundra Plateau.
If an orb rolls down a slope or drops off a ledge:
- Let it finish rolling (don’t fight it the whole way)
- Activate Recall
- Ride the object’s movement backward to recover height and position
This turns a “reset moment” into a 10-second correction.
Step 4: Use Ascend to cheat vertical transport when possible
If an orb ends up under a ledge or you find a path that goes beneath part of the ruin:
- Carry/drag the orb to the underside
- Ascend through the ceiling to pop up on top
- Continue transport from a higher, safer platform
Ascend is especially helpful during rain because it reduces the need to climb.
Step 5: Stabilize the orb placement before you let go
When you place an orb into a socket/pedestal:
- Rotate it gently until it “settles”
- If it’s perched on a slight angle, nudge it until gravity isn’t fighting you
- If the wind or terrain is causing weird physics, use a temporary brace object next to it
A lot of “it didn’t count” moments are actually “it rolled one inch out of alignment.”
Step 6: If lightning is constantly interrupting you, work in short cycles
Don’t force a long carry while lightning warnings keep triggering. Work like this:
- Move the orb 10–20 meters
- Pause when the warning hits
- Unequip metal if needed (even if you think you already did)
- Continue when safe
You lose less progress this way, and your focus stays sharp.
Thundra Plateau Cave and Nearby Underground Rewards (What to Look For)
Even if your main goal is the plateau puzzle, treat the surrounding area like a “complete sweep” zone. TotK caves often hide some of the most worthwhile rewards in the region, and stormy landmarks frequently have cave content nearby.
When searching around Thundra Plateau, here’s what to do:
Check the outer slopes for suspicious rock and openings
Walk the full perimeter once. You’re looking for:
- Openings tucked under the rim
- Breakable rock walls
- Areas where the terrain dips under the plateau’s stone structure
What to expect inside: practical combat and resource tips
Caves near major landmarks commonly include:
- Tight tunnels that punish explosive overuse
- Enemies that cling to ceilings or ambush from vertical angles
- Ore deposits that make the detour worthwhile even if you’ve already cleared the main puzzle
- A “collector target” that rewards thorough exploration (if you’re tracking those progression systems)
If you’re using brightbloom seeds, drop them at junctions so you don’t loop in circles. And if you’re dealing with enemies that knock you back, fight with your back to a wall so you don’t get pushed into water or off ledges.
Practical Insights: How to Make Thundra Plateau Easier Than It Looks
Here are the real “this changes everything” insights that experienced players use.
Use the storm instead of fearing it
If enemies are harassing you and you’re confident you can avoid being the lightning target:
- Drop a metal weapon or shield a safe distance away from you
- Let the lightning aim for it
- Lure enemies toward that strike zone
You’re essentially creating a lightning trap. It won’t solve every encounter, but when it works, it’s hilarious and efficient.
Don’t duel electric enemies on wet ground
Wet ground increases the chaos of electric fights. Instead:
- Use ranged attacks from a slight elevation
- Use Zonai devices that apply steady pressure (so you’re not committed to close combat)
- Use elemental counters that don’t require you to stand in the danger zone
The fastest puzzle clears look “slow” on purpose
The most consistent way to clear orb transport isn’t sprinting; it’s stable movement with minimal resets:
- cradle build
- short pushes
- Recall corrections
- stabilize placements
That rhythm beats panic-carrying every time.
Examples: 3 Reliable Ways to Clear Thundra Plateau in TotK
Different players have different toolkits. These three approaches cover most playstyles.
Example 1: Early-game “no fancy gear” route
Best when: you reached the area naturally and don’t have specialized armor yet.
- Cook one shock-resistance meal if possible
- Equip wooden weapon/shield/bow
- Use Ultrahand to drag orbs with a simple two-piece cradle
- If an orb falls, Recall it back uphill
- Avoid prolonged fights; clear only what blocks your transport path
This method is slower, but safe and consistent.
Example 2: Mid-game builder route (fast and controlled)
Best when: you’re comfortable with Zonai parts and like engineering solutions.
- Build a low cart with side walls
- Add a fan for controlled movement if terrain allows
- Park the cart next to each pedestal, then lift and place precisely
- Use a spare board as a wheel-chock to stop rolling on slopes
You’ll feel like you’re “cheating,” but you’re actually just using TotK’s intended physics toolkit.
Example 3: Late-game “storm doesn’t matter” route
Best when: you’re farming the area or just cleaning up missed content.
- Wear your best anti-electric setup
- Use Autobuild mobility to hop between points
- Skip most combat with speed and positioning
- Optimize transport with a reusable orb cradle blueprint
At this stage, Thundra Plateau becomes a quick pit stop instead of a danger zone.
Expert Tips for Thundra Plateau TotK (The Stuff You Only Learn After a Few Visits)
Tip 1: Keep one non-metal loadout saved mentally
A common death is forgetting you swapped to a metal bow after a fight. Before you re-enter the storm bubble, do a quick check:
- weapon
- shield
- bow
If any are metal, swap now—not after the warning starts.
Tip 2: Use “decoy metal” to control lightning timing
If you drop metal away from your work area, lightning often targets it instead of you. This can buy you calmer windows to do precise Ultrahand placements, especially if you’re tired of getting interrupted mid-lift.
Tip 3: Don’t fight on the plateau’s highest lip
If you must fight during the storm:
- move slightly lower
- keep cover nearby
- avoid becoming the tallest point in open space
You’ll take fewer random strikes and less knockback risk.
Tip 4: Fuse for safety, not just damage
If you’re relying on weapons in the storm:
- prioritize fusions that let you keep a non-metal base weapon
- avoid turning a safe wooden weapon into a lightning magnet by fusing something conductive that changes your approach
Tip 5: Mark your dropped items (so you don’t lose gear)
If you drop metal to avoid lightning, it’s easy to forget where it landed in tall grass or rocky clutter. Drop it somewhere visually obvious—flat stone, the center of a ring, or next to a distinctive pillar—so you’re not searching later while enemies respawn.
Common Mistakes Players Make on Thundra Plateau
Mistake 1: “It’s fine, I’ll just tank one lightning hit”
Lightning isn’t just damage; it’s disruption. You get knocked down, lose tempo, and can get chain-hit by enemies. Even with good hearts, it’s an avoidable risk.
Mistake 2: Carrying an orb while wearing metal gear
This is the perfect storm of bad outcomes: you’re slowed down, you can’t react quickly, and you’re likely exposed in the open. Always handle equipment first, puzzle second.
Mistake 3: Overusing bombs in tight cave spaces
Explosives are tempting, but in cramped tunnels they can:
- launch loot into awkward places
- break fragile ore in a way that scatters resources
- knock you down at the worst moment if enemies are close
Use them carefully and only when you have space.
Mistake 4: Trying to climb through constant rain
If you’re slipping, stop forcing it. TotK rewards rerouting. Walk around, find an incline, use Ascend, or approach from above.
Mistake 5: Ignoring stabilization when placing puzzle objects
If the object is even slightly unstable, it may roll out of the “counting” position. Take the extra two seconds to settle it.
FAQs About Thundra Plateau TotK
Is Thundra Plateau always storming in TotK?
It’s known for persistent thunderstorm conditions, especially when you’re within the plateau’s immediate area. That storm behavior is part of the challenge, so expect lightning to be a factor most of the time you’re there.
How do I stop getting struck by lightning on Thundra Plateau?
The most reliable fixes are:
- unequip metal weapons/shields/bows during the storm
- wear shock-resistant or lightning-proof gear
- avoid standing exposed during the warning cue
If you do all three, lightning becomes more nuisance than threat.
What’s the easiest early-game way to survive Thundra Plateau?
Bring or cook shock resistance, switch to wooden/non-metal gear, and move in short “safe cycles” rather than trying to rush. Recall is your best friend for fixing mistakes without resets.
Do I need to fight everything on the plateau?
No. If your goal is the puzzle or exploration, you can often avoid unnecessary fights by clearing only what blocks your transport route or what actively interrupts your Ultrahand work.
What ability helps the most with the orb transport puzzle?
Ultrahand is the obvious core tool, but Recall is the secret MVP for recovering from rolls and drops. Ascend can also dramatically reduce rain-climbing frustration if the terrain allows it.
Why does the orb keep rolling out of place after I set it down?
Usually it’s one of these:
- the pedestal is slightly sloped
- you released it while it still had rotational momentum
- wind/physics nudged it after placement
Stabilize it by nudging gently, rotating for a flatter “resting” position, or bracing it temporarily with another object.
Is there a cave at or near Thundra Plateau?
There is typically cave content associated with major landmarks and plateau formations in TotK’s world design, and the best approach is to do a full perimeter sweep of the rim and nearby slopes to locate entrances and breakable walls.
Can I use the lightning to damage enemies?
Yes. If you place or drop conductive metal away from yourself, lightning can target it. With good positioning, you can lure enemies into that strike area. Just don’t stand close enough to get caught in the blast or stun.
Is Thundra Plateau worth revisiting later?
Absolutely. Once you’re lightning-proof or comfortably shock-resistant, it becomes a fast, efficient location to practice physics-based puzzle solving and potentially farm electric-themed materials and nearby cave resources.
Conclusion: Turn Thundra Plateau Into a Quick Win, Not a Death Loop
The reason the thundra plateau totk area sticks in people’s memory is the same reason it frustrates them: it’s not hard because of one single enemy or one single puzzle step—it’s hard because it forces you to respect TotK’s systems all at once. Weather matters. Materials matter. Equipment choices matter. And the moment you stop treating it like a normal ruin and start treating it like a storm-management challenge, everything clicks.
Go in prepared, keep metal off your hands when the sky starts screaming, use Ultrahand with stabilization in mind, and lean on Recall to erase the “oops” moments. Do that, and Thundra Plateau stops being a scary lightning trap and becomes one of the most satisfying little mastery checks in the game—and a place you’ll be genuinely confident revisiting whenever you feel like it.