
If you want a character in Baldur’s Gate 3 who can walk into the worst situation imaginable and come out laughing—bloodied, maybe on fire, but absolutely victorious—the BG3 barbarian is the cleanest answer. Barbarians don’t just “hit hard.” They control the tempo of combat. They force enemies to react. They turn dangerous encounters into simple math: you can’t kill what you can’t meaningfully hurt, and a raging barbarian is famously difficult to put down.
This guide takes you from absolute beginner basics (stats, Rage, what to click in combat) all the way to advanced optimizations (throw builds, Tavern Brawler, multiclass breakpoints, tactical positioning, and party synergy). You’ll finish with practical build templates you can actually play—without relying on gimmicks that only work in perfect conditions.
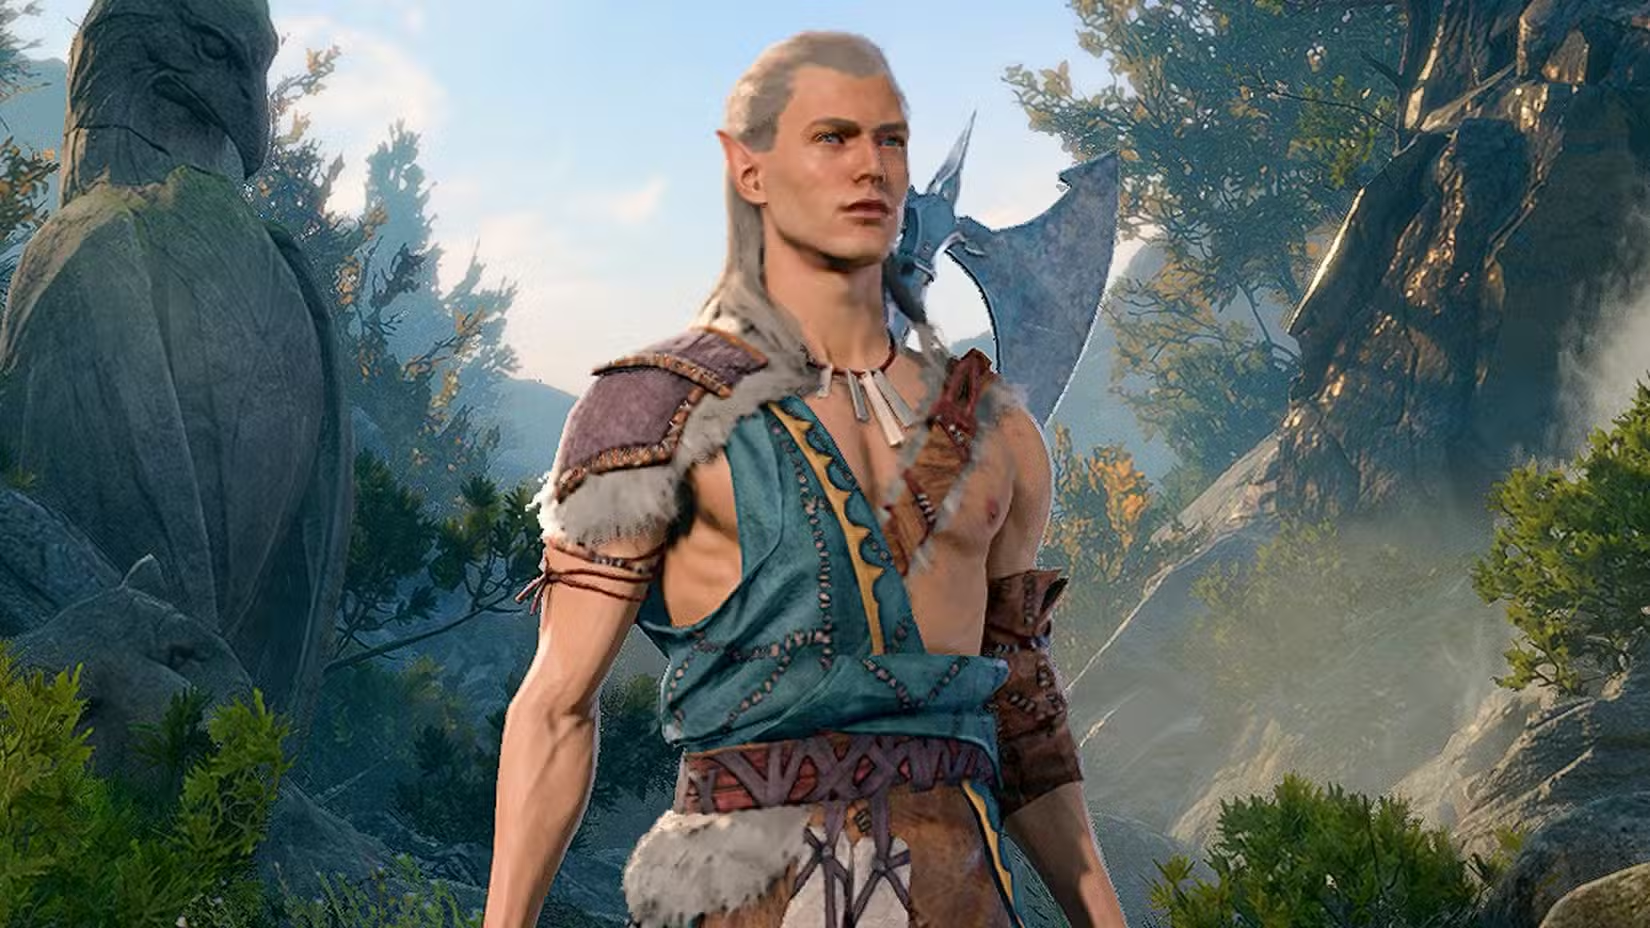
What Makes the BG3 Barbarian So Strong?
At a glance, barbarian power comes from three pillars:
- Rage: You deal more damage and gain resistance to common physical damage types, which is effectively a huge survivability multiplier.
- Advantage access: Reckless Attack gives you advantage on demand, turning inconsistent melee swings into reliable hits.
- Action economy pressure: Barbarians thrive when they’re in the enemy’s face early. With high movement, shoves, throws, and prone effects, they disrupt enemy plans before those plans happen.
In BG3 specifically, barbarians also benefit from the game’s physics and terrain systems. Throwing enemies off ledges, hurling objects, shoving targets prone, and forcing clumps into hazard zones are all “barbarian-friendly” ways to win fights even when raw damage isn’t the whole story.
BG3 Barbarian Class Overview (Beginner-Friendly)
Core Barbarian Features You’ll Use Every Fight
Rage (The Barbarian’s Engine)
Rage is your main resource and your identity. While raging, you typically gain:
- Bonus damage on melee attacks (scales as you level)
- Resistance to bludgeoning, piercing, and slashing damage (this is the big one)
- A playstyle incentive to stay aggressive and keep fighting in melee
Practical rule: If you expect a real fight (not a trivial cleanup), Rage early. The earlier you Rage, the more value you get out of the resistances and bonus damage over the full combat.
Reckless Attack (Your “I Will Hit” Button)
Reckless Attack gives you advantage on melee attack rolls, but enemies also gain advantage to hit you until your next turn.
New-player tip: Reckless Attack is strongest when you can’t afford to miss (high-priority target, finishing a caster, breaking concentration) or when you’re already hard to kill (Rage active, good armor class, temporary hit points, or strong healing support).
Unarmoured Defence (Nice, Not Mandatory)
Unarmoured Defence lets you calculate Armor Class using Dexterity and Constitution while unarmoured. In practice, many barbarians still wear medium armor early because it’s easy and effective. Unarmoured setups become more attractive when your Constitution is high, your Dexterity is decent, and you have great clothing options.
Danger Sense, Extra Attack, Fast Movement
These are the features that make the class feel smooth:
- Danger Sense helps you avoid nasty area effects.
- Extra Attack at level 5 is a huge damage jump.
- Fast Movement helps you close gaps, chase archers, and keep pressure on casters.
Best Barbarian Subclasses in BG3 (And Who They’re For)

BG3 Barbarian subclasses that play very differently. None are “bad,” but each rewards a particular mindset.
Berserker Barbarian (Best for Direct, Aggressive Play)
Berserker is the classic: more violence, less thinking. It’s excellent if you like straightforward turns and don’t want to rely on situational mechanics.
Why it’s strong:
- Frenzy gives you access to brutal bonus actions that convert your action economy into more damage or control.
- Berserker turns “I’m in melee” into “something is dying every turn.”
Best for:
- New players who want a reliable, simple barbarian
- Players who love deleting one target per round
- Builds focused on Great Weapon Master or heavy two-handed weapons
Wildheart Barbarian (Best for Control, Mobility, and Utility)
Wildheart is the tactical barbarian. You pick an animal heart that shapes your kit and often adds unique movement or control tools.
Why it’s strong:
- You can tailor your barbarian to your party and the campaign
- It tends to add real utility: mobility, survivability, or crowd control
- It rewards smart positioning and turn planning
Common standouts:
- Bear Heart: the “I refuse to die” option, ideal for soaking damage and holding choke points.
- Tiger Heart: great for aggressive multi-target pressure and bleeding-style play patterns.
- Elk/Wolf-style options: excellent for team synergy and movement-focused gameplay.
Best for:
- Players who like adapting to fights
- Party leaders who want their barbarian to enable allies, not just swing
Wild Magic Barbarian (Best for Chaos, Fun, and Surprising Value)
Wild Magic adds unpredictable surges when you Rage. Sometimes it’s game-changing. Sometimes it’s weird. In BG3, “weird” can still be very strong because battlefields are complex and advantages stack quickly.
Why it’s strong:
- When the surge aligns with the fight, you get huge value
- It can add utility your party might otherwise lack
Best for:
- Players who enjoy improvisation
- Roleplayers who want their barbarian to feel primal and untamed
Best Barbarian Ability Scores (And Why They Matter)
If you want your BG3 barbarian to feel powerful from the start, prioritize this:
Strength (Main Stat)
Strength drives:
- Melee hit chance and damage
- Shove success
- Throw accuracy and damage (for throw builds)
- Carry capacity (which matters more than you’d think for improvised weapons and loot)
Constitution (Survivability and Unarmoured Defence)
Constitution increases:
- Hit points every level
- Unarmoured Defence value (if unarmoured)
- Overall staying power, especially when enemies have advantage from your Reckless Attack
Dexterity (Armor Class and Initiative)
Dexterity matters because:
- It affects initiative (going earlier is a big deal for melee)
- It boosts AC in medium armor (up to the cap) or unarmoured
- It improves common saves and exploration checks
Practical baseline for most barbarian builds:
- Strength: high
- Constitution: high
- Dexterity: moderate
- Everything else: preference/roleplay, but don’t tank Wisdom too hard unless you enjoy failing control effects
Best Races, Backgrounds, and Skills for Barbarian
Races That Feel Great on Barbarian
Pick what you like, but these tend to pair smoothly:
- Races with movement tools or defensive passives (closing distance matters).
- Races that give useful utility spells can still be valuable even if you don’t cast while raging, because out-of-combat utility is real.
Backgrounds
Barbarians shine with backgrounds that support:
- Athletics (for shoves, jumps, and throws)
- Intimidation (dialogue control)
- Survival/Perception (party utility)
Skills to Prioritize
- Athletics is the big one for physical control.
- Intimidation if you want a strong “front of the party” presence.
- Perception is never wasted if no one else covers it well.
Leveling Guide: Key Power Spikes from 1 to 12
You don’t need a rigid “click this at every level” plan to succeed, but knowing the spikes helps you plan fights and gear.
Levels 1–4: Survive, Close Distance, Learn Rage Timing
Early barbarian is already good because Rage carries you. Your focus:
- Get into melee without wasting turns
- Use Reckless Attack when it matters
- Learn when to shove/throw instead of just swinging
Feat at level 4 is a major decision. More on that below, because it defines your build direction.
Level 5: Extra Attack (The Moment You Become a Threat)
Extra Attack doubles your baseline output. This is where barbarian damage becomes consistent and scary.
If you ever felt like you were “almost” killing enemies at level 4, level 5 fixes that.
Levels 6–8: Subclass Depth and Build Identity
This is where your subclass features start to feel like a full kit rather than a theme. You also get another feat at level 8, which often completes your core build.
Levels 9–12: Polishing and Monster Mode
Late-game barbarian is about:
- Reliability (hitting when you need to hit)
- Staying power (surviving focus fire)
- Turn efficiency (bonus action value, positioning, and target selection)
Best Feats for BG3 Barbarian (With Practical Use Cases)
Tavern Brawler (The Throw Barbarian Kingmaker)
If you want a throw barbarian or an improvised weapon monster, Tavern Brawler is a defining feat. It dramatically increases the value of:
- Throwing weapons and objects
- Improvised melee weapons
- Strength-based brawling playstyles
Who should take it:
- Any barbarian planning to throw enemies, throw weapons, or lean into the battlefield physics
- Players who want a build that feels uniquely “BG3,” not just classic D&D
Practical insight: Throwing is not just damage. Throwing can reposition enemies into hazards, off ledges, or away from your backline.
Great Weapon Master (Classic Two-Handed Barbarian)
Great Weapon Master is ideal if you:
- Use big two-handed weapons
- Want huge burst turns
- Are comfortable managing accuracy (Reckless Attack helps a lot here)
It’s a “win more” feat that turns advantage into real damage.
Alert (Initiative Wins Fights)
Going early lets you:
- Rage before taking damage
- Lock down a dangerous archer or caster
- Start the fight on your terms
Alert is especially strong if you hate getting caught flat-footed or if your party relies on fast, decisive openings.
Athlete / Mobile-Style Play (Positioning Focus)
If you find yourself wasting turns dashing or failing to reach enemies, movement-enhancing choices can outperform raw damage feats, especially on terrain-heavy maps.
Ability Score Improvements (Still Excellent)
Sometimes the best “feat” is simply making your Strength or Constitution better. If your hit chance feels shaky or you’re dropping too often, raw stats fix problems in a way flashy feats can’t.
Best Weapons and Gear Priorities for Barbarian
Instead of listing specific named items (which can spoil discovery and vary by playthrough decisions), use these priorities.
Weapon Types That Fit Barbarian Best
- Two-handed heavy weapons for burst and Great Weapon Master synergy
- Versatile weapons if you want flexibility between damage and defense
- Thrown weapons if you’re building around Tavern Brawler or ranged pressure
Armor Choices: Medium Armor vs Unarmoured
- Medium armor is easy, consistent, and strong early to mid game.
- Unarmoured can become excellent when your Constitution is high and your clothing options are strong.
Rule of thumb: Don’t force Unarmoured Defence if it’s not beating your best medium armor. Barbarian strength comes from Rage and offense, not from stubbornly refusing armor.
Accessories and Passive Effects to Look For
Barbarian loves:
- Movement boosts
- Damage riders on weapon hits
- Bonus action improvements
- Temporary hit points or damage reduction tools
- Effects that reward being in melee or being hit (because enemies will swing at you)
Combat Tactics: How to Play BG3 Barbarian Like an Expert
A well-played barbarian doesn’t just “attack twice.” They solve the fight.
Opener Priorities (Your First Turn Matters)
- Rage if the fight is real.
- Close distance without wasting your action if possible.
- Decide who must be removed immediately (usually a caster, control enemy, or high-damage ranged threat).
- Use Reckless Attack strategically, not automatically.
If you can eliminate or disable one key enemy early, the rest of the fight often collapses in your favor.
Target Selection: Don’t Chase the Tank
Barbarians sometimes fall into the trap of hitting the biggest enemy in front of them while a dangerous caster free-casts in the back.
Better approach:
- Kill or disrupt the enemy who is actively winning the fight (often in the backline).
- Use movement, jumping, and throws to reach them.
- If you can’t reach them, throw something at them or reposition their bodyguards.
Shove, Throw, and Prone: The Barbarian’s “Third Attack”
In BG3, controlling enemies physically is often as valuable as damage.
- Shove enemies off ledges when safe and sensible.
- Throw enemies to break formations or remove them from high ground.
- Prone targets lose effectiveness and can become easy prey for your party.
Practical example: If an enemy archer is on high ground with a clear line of sight to your wizard, don’t race up the stairs if it costs you two turns. Jump, shove, or throw to break their position immediately.
Holding the Line vs Diving the Backline
Your barbarian can play two roles:
- Anchor: stand in a choke, soak damage, keep enemies off allies
- Diver: sprint/jump into the backline and delete key threats
Which is correct depends on your party. If your group has fragile casters, anchoring might win more fights. If your party already has strong control and safety, diving ends fights faster.
Rage Management: When to Save It and When to Spend It
Don’t hoard Rage out of fear you’ll “need it later.” Most difficult fights are difficult because you didn’t use your tools early enough.
A good habit:
- Use Rage in any fight where enemies can meaningfully damage you or where the enemy count is high.
- Skip Rage only when you’re cleaning up trivial encounters and want to conserve resources.
Practical Build Examples (Beginner to Advanced)
Below are build templates you can adapt without needing perfect gear or a specific party.
Example 1: Classic Two-Handed Berserker (Simple, Devastating)
Playstyle: Run in, go Reckless when needed, delete one enemy per turn.
Core choices:
- Subclass: Berserker
- Feats: Great Weapon Master (or Strength increase first if accuracy feels low), then a survivability or initiative option
- Stats: High Strength, high Constitution, moderate Dexterity
How it wins:
- Reliable advantage from Reckless Attack fuels big hits
- You pressure enemies so hard they can’t execute their plan
Best party fit:
- Allies who can heal, buff, or control enemies so you can stay aggressive
Example 2: Wildheart Frontline Controller (Team-Enabling Bruiser)
Playstyle: You’re not just damage—you’re the reason your party survives.
Core choices:
- Subclass: Wildheart (pick a heart that matches your needs: tanky, mobile, or multi-target pressure)
- Feats: Stats early, then an initiative or mobility option
- Skills: Athletics, plus party-utility skills based on your companions
How it wins:
- You occupy space, force enemies into bad trades, and keep threats away from squishies
- You create advantage for your party through positioning and control
Best party fit:
- Ranged damage dealers who want safety
- Casters who need someone to hold melee enemies in place
Example 3: Tavern Brawler Throw Barbarian (BG3 Physics Abuse Done Right)
Playstyle: You turn the battlefield into a weapon. Enemies, chairs, barrels—everything is ammunition.
Core choices:
- Feat: Tavern Brawler as early as possible
- Stats: Strength as high as you can reasonably make it, then Constitution
- Combat loop: Rage, then throw weapons/enemies to disrupt, finish with melee when they close in
How it wins:
- Throwing doubles as damage plus control plus repositioning
- You punish enemy high ground and formations without needing spells
Best party fit:
- Any party, because throwing solves problems your casters might otherwise spend resources on
Advanced Tips That Separate Good Barbarians from Great Ones
Use Reckless Attack Like a Tool, Not a Habit
If you’re already hitting reliably, you don’t always need to go Reckless and invite advantage against you. Save it for:
- High AC targets
- Finishing blows
- Breaking concentration
- When you need a critical hit chance bump
Think in “Enemy Turns Denied”
If you shove someone prone, throw them off a platform, or force them to dash back into position, you effectively stole their turn value. That’s often better than a small damage increase.
Don’t Waste Movement: Jump Is Your Friend
Jumping is one of the most “barbarian” mechanics in BG3. It helps you:
- Close distance efficiently
- Reach high ground
- Bypass difficult terrain
- Get behind enemy lines without eating opportunity attacks in awkward paths
Build for Your Party, Not Just for Yourself
A barbarian that complements allies is terrifying. For example:
- If you have a wizard who loves area spells, your job is to throw or shove enemies into those zones.
- If you have a rogue, your job is to stand next to their target and create openings while they pick off priority enemies.
Common Mistakes BG3 Barbarian Players Make
1) Forgetting to Rage at the Start of Real Fights
You’re not “saving resources” if you die with Rage charges available. Rage is your biggest durability tool.
2) Using Reckless Attack Every Single Swing
Reckless is amazing, but it’s not free. If multiple enemies are about to swing at you, giving them advantage can turn a safe situation into a downed barbarian.
3) Ignoring Initiative and Mobility
A barbarian that goes late often spends the first round chasing. A barbarian that goes early ends the fight before it gets messy.
4) Overvaluing Armor Class and Undervaluing Resistance
Barbarian durability is frequently about damage reduction through Rage, not about never getting hit. You can afford to be hit—especially if it means you’re controlling the fight.
5) Tunneling the Nearest Target
Kill the enemy that matters. If a caster is controlling your party, your barbarian should be the one who makes them panic.
FAQs About the BG3 Barbarian
Is barbarian good in BG3 compared to fighter or paladin?
Yes. Fighter and paladin are excellent, but barbarian brings unique strengths: Rage resistances, easy advantage via Reckless Attack, and unmatched physical battlefield control through shoves and throws. Barbarian also performs well without needing heavy resource management.
Which barbarian subclass is best in BG3?
It depends on what you want.
- Berserker is best for simple, direct damage and aggressive turns.
- Wildheart is best for adaptable utility and strong frontline control.
- Wild Magic is best for players who enjoy chaotic, flexible combat value.
Is Tavern Brawler worth it on barbarian?
If you plan to throw often, absolutely. It can define your entire build and makes BG3’s physics-based combat feel incredibly rewarding. If you never throw and only swing a two-hander, it’s less important.
Should I wear armor as a barbarian?
You can, and often should early on. Medium armor is strong and convenient. Go unarmoured only if your Dexterity and Constitution (plus your clothing options) make your Armor Class competitive.
What ability scores should I prioritize?
Strength first, Constitution second, Dexterity third for most builds. After that, pick based on roleplay and how much you dislike failing certain saving throws and dialogue checks.
How do I stop dying when I use Reckless Attack?
Rage early, improve Constitution, consider initiative boosts so you act first, and use positioning to avoid being surrounded. Reckless Attack is safest when you’re not eating six enemy attacks in one round.
Can barbarian be the party face?
Yes, especially if you invest in Intimidation and roleplay a strong presence. You won’t replace a dedicated charisma caster in every scenario, but a barbarian can absolutely drive dialogue outcomes through force of personality.
Conclusion: Build Your BG3 Barbarian Around How You Like to Win
The best BG3 barbarian isn’t a spreadsheet character—it’s the one that fits your instincts in combat. If you love direct, relentless aggression, Berserker with a big weapon will feel unstoppable. If you prefer winning through positioning, denial, and team synergy, Wildheart will make you feel like a battlefield commander. If you want every fight to feel a little different and occasionally absurdly powerful, Wild Magic keeps the game fresh.
No matter which path you choose, your fundamentals are the same: Rage early in real fights, use Reckless Attack with intent, prioritize Strength and Constitution, and remember that in BG3, the environment is part of your weapon kit. Once you start thinking like that, barbarian stops being “the class that hits things” and becomes the class that decides how the fight is allowed to go.